 4.9 (349 Reviews)
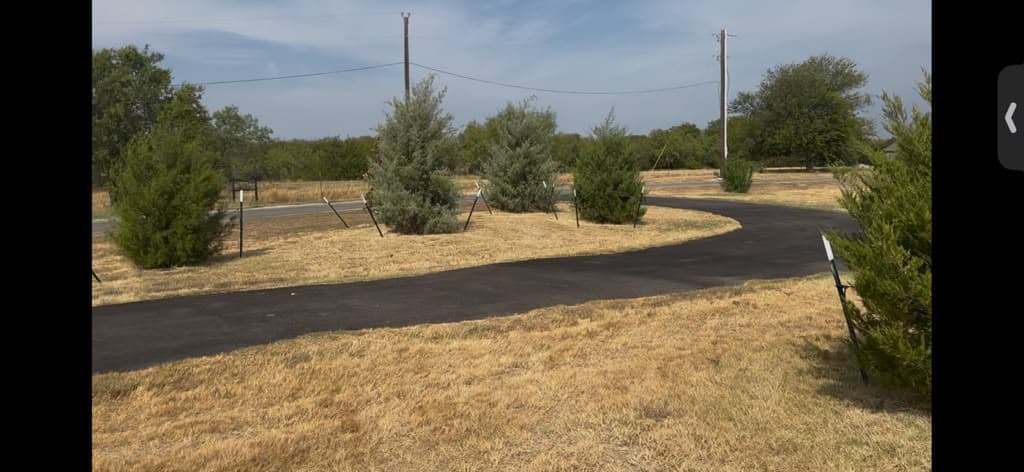
Today we’re here in Fort Worth, Texas, walking a property where several new trees have recently been planted. Instead of waiting for these trees to become stressed and then trying to correct the problems afterward, I want to show homeowners what should happen during planting and throughout the establishment period.
This is where long-term tree health begins.
You can purchase an excellent tree from a reputable nursery, but if the root system is not prepared correctly, the planting hole is poorly constructed, the soil interface is wrong, the root flare is buried, or irrigation is improperly managed, that tree can spend years struggling to establish.
Sometimes it never establishes at all.
One of the biggest lessons I’ve learned working with newly planted trees throughout North Texas is this:
Planting the tree is not the finish line. Root establishment is the goal.
For this Fort Worth property, we’re paying particular attention to:
- Nursery root-ball substrate
- Girdling and circling roots
- Root-flare depth
- Planting-hole preparation
- Glazed and compacted soil
- Native-soil backfill
- Structural branches and trunk taper
- Pneumatic soil aeration
- Proper mulching
- Irrigation berms
- Water management
- Soil oxygen
When these fundamentals are handled correctly from the beginning, we give the tree a much better opportunity to become established before North Texas heat begins testing it.
⸻
The Root Ball Is Where I Start
Before I worry about fertilizer, fungicide, insecticide, or any other Plant Healthcare treatment, I want to inspect the tree that came from the nursery.
Specifically, I want to see the root ball.
Container-grown trees can develop roots that circle around the inside of the container rather than growing outward.
Those roots don’t necessarily correct themselves simply because the tree has been removed from the pot and placed into the ground.
If we bury that architecture without inspecting it, we’re potentially burying tomorrow’s problem.
⸻
Remove the Container and Inspect the Root System
Once the tree is removed from the planter or container, inspect the exterior of the root ball.
We’re looking for:
- Circling roots
- Girdling roots
- Matted roots
- Roots growing upward
- Roots crossing the root flare
- Excess substrate covering the flare
- Abnormal root architecture
This is one reason I don’t want the planting crew rushing this process.
You may have only one opportunity to properly inspect that root system before it’s buried.
⸻
Find the Actual Root Flare
One of the most common problems with nursery trees is that the top of the container is not necessarily the location of the tree’s true root flare.
There may be several inches of substrate above the first major structural roots.
That means if we simply plant the top of the container level with the surrounding grade, we can unintentionally plant the tree too deeply.
Sometimes we need to carefully remove the upper one to three inches of excess substrate to locate the true root flare and first major structural roots.
The amount removed should be based on what we actually find—not an automatic fixed depth for every tree.
The objective is finding the flare.
⸻
Correct Girdling and Circling Roots Before Planting
Once the upper root system is visible, we can begin identifying roots that are circling or potentially girdling the trunk.
A healthy root system should transition outward into the surrounding soil.
When roots circle the root ball, they can continue increasing in diameter over time.
Eventually some may press against the trunk or other major roots.
That’s how a problem that begins at the nursery can become a serious structural and physiological problem years later.
Correcting problematic root architecture before planting is considerably easier than performing root surgery on a mature tree
⸻
Why Girdling Roots Become Dangerous
Roots and trunks both increase in diameter.
When a root grows across the trunk or root flare, those tissues eventually begin competing for physical space.
Mechanical pressure develops.
That pressure can interfere with normal radial growth and may affect vascular tissues.
The homeowner may not notice anything for years.
Eventually we may see:
- Reduced canopy vigor
- Premature leaf drop
- Branch dieback
- Poor growth
- An abnormal root flare
- Progressive decline
The best time to address a potentially girdling root is often before the tree ever enters the planting hole.
⸻
The Planting Hole Should Be Wide, Not Deep
This is one of the most important planting principles.
The planting hole should generally be no deeper than necessary to position the root flare correctly, but the upper portion of the planting area should be considerably wider than the root ball.
For these trees, I want the upper soil loosened outward approximately two to three times the width of the root ball where site conditions allow.
Why?
Because the tree needs to establish roots laterally into the surrounding soil.
We’re not trying to encourage the tree to grow straight downward into a narrow cylinder.
We’re creating an environment where roots can transition outward from the nursery root ball into the native soil.
⸻
Most Absorbing Roots Need the Upper Soil Profile
You’ll often hear me say that the important root activity is happening near the soil surface.
That’s because oxygen availability is generally greater in the upper soil profile, and a large proportion of fine absorbing roots develop there.
I wouldn’t say that all tree roots exist within the top six inches—structural and other roots can extend substantially deeper depending on soil and site conditions.
But the upper soil profile is extremely important for fine-root development, oxygen exchange, water uptake, and nutrient acquisition.
That’s why I want the upper 6 to 12 inches surrounding a newly planted tree to provide favorable rooting conditions.
⸻
Break Up Compacted Soil Around the Planting Area
North Texas soils can become extremely compacted.
Construction makes it worse.
Heavy equipment makes it worse.
Repeated traffic makes it worse.
Compacted soil loses valuable pore space.
And roots don’t grow through soil simply because we want them to.
They need an environment that allows physical penetration, oxygen diffusion, water movement, and biological activity.
This is where pneumatic soil tools can become extremely useful.
⸻
Using an Air Spade or Pneumatic Soil Excavator
When appropriate, we can use an AirSpade or other pneumatic soil-excavation/aeration equipment to fracture compacted soil within the upper root environment without aggressively chopping through roots.
Our objective is creating a more open soil structure.
We’re trying to improve:
- Macroporosity
- Oxygen movement
- Water infiltration
- Root penetration
- Drainage
- Biological activity
For establishment work, concentrating remediation within approximately the upper 6 to 8 inches can be particularly valuable because this is where we want substantial new absorbing-root development.
⸻
Avoid the Glazed Planting Hole
Another problem develops when planting holes are dug into wet or heavy soil using mechanical equipment.
The sides of the hole can become glazed or smeared.
Instead of leaving a rough soil interface that roots can penetrate, the excavation creates a smooth, compacted wall.
Now you’ve essentially created a pot in the ground.
Roots reach that interface and encounter a completely different physical environment.
Water movement can also be affected.
That’s why the sides of the planting area should be roughened and decompacted rather than left smooth and polished.
⸻
Think About the Root-Ball/Native-Soil Interface
This is something we’ve been paying increasingly close attention to in our Plant Healthcare work.
The substrate inside a nursery root ball can be very different from the soil surrounding it.
The nursery substrate may be:
- Coarser
- Higher in organic matter
- Faster draining
- Lower density
Then we install that root ball into North Texas clay or another mineral soil.
Suddenly we have two different soil structures touching each other.
Water doesn’t necessarily move through those materials uniformly.
That can create establishment problems.
⸻
Why Native Soil Should Usually Be the Primary Backfill
For typical landscape planting, I prefer using the excavated native soil as the primary backfill unless a specific soil-management prescription tells us otherwise.
Why?
Because we want new roots to transition into the actual soil environment where they will spend the rest of their lives.
If we create a highly amended pocket of dramatically different material around the root ball, we can create another soil interface with different water-holding and drainage characteristics.
The planting hole should not become an oversized flowerpot.
We want integration with the surrounding landscape.
⸻
Understanding Perched Water and Soil Interfaces
Different soil textures contain different pore sizes.
That affects how water moves across soil interfaces.
When coarse and fine-textured materials meet, water movement may change because capillary forces are different between those materials.
Under certain configurations, water can temporarily accumulate above an interface rather than immediately moving into the next soil layer.
This is one reason we don’t want to create dramatic artificial soil layers inside a planting hole without understanding how water will move through them.
Successful establishment requires continuity between the root ball, backfill, and surrounding soil.
⸻
Don’t Dig the Hole Deeper Than Necessary
A wide planting area is beneficial.
An unnecessarily deep planting hole is not.
If we loosen soil deeply underneath a heavy root ball, that soil can settle.
Then the tree settles with it.
Now the root flare that was originally installed at the proper elevation can end up several inches below grade.
That’s why I want the tree sitting on firm, undisturbed or properly compacted native soil beneath the root ball, with the flare positioned correctly relative to finished grade.
Go wide.
Don’t unnecessarily go deep.
⸻
Protect the Lower Temporary Branches
Here’s another establishment mistake I see.
A newly planted tree arrives with lower branches, and somebody immediately wants to remove them because they don’t fit the appearance of the future mature canopy.
Don’t rush.
Those lower temporary branches serve an important biological and structural purpose while the tree is young.
They contribute photosynthesis.
They also contribute to trunk taper development.
⸻
What Is Trunk Taper?
A structurally developing tree should normally be wider toward the bottom and progressively narrower toward the top.
That’s taper.
Lower branches contribute to radial trunk growth and help young trees develop stronger stem architecture.
Remove too many lower branches too early and we can encourage a tall, slender trunk with poor taper.
Then we create a tree with a disproportionately heavy upper canopy supported by an inadequately developed lower stem.
That’s not the structural architecture I want.
⸻
Don’t Raise the Canopy Too Fast
Eventually some lower temporary branches may need to be subordinated or removed as the tree develops.
But that should happen gradually.
Structural development is a process.
We’re trying to guide the tree toward its mature architecture without sacrificing the biological structures it needs during establishment.
A newly planted tree does not need to look like a mature tree immediately.
Let it develop.
⸻
Mulch Is One of Our Best Establishment Tools
After planting and soil preparation, apply an appropriate layer of coarse organic mulch.
For this type of installation, approximately 2 to 3 inches is generally enough.
I prefer coarse, long-fiber organic mulch rather than an extremely fine material that mats tightly together.
Mulch helps:
- Moderate soil temperature
- Reduce evaporation
- Protect soil structure
- Reduce turf competition
- Add organic matter gradually
- Support soil biology
But mulch should be spread outward—not upward.
⸻
Keep Mulch Away From the Root Flare
Never pile mulch directly against the trunk.
We want the natural root flare visible.
Mulch piled against the trunk can retain unnecessary moisture, conceal developing girdling roots, and create an unfavorable environment around tissues that were never designed to remain buried.
Think:
Wide mulch ring.
Shallow mulch depth.
Visible root flare.
No mulch volcano.
⸻
Build a Watering Berm When Appropriate
In North Texas, newly planted trees can experience brutal establishment conditions.
Temperatures above 100°F are common during summer.
A properly constructed soil berm around the outside of the planting area can help direct irrigation water toward the root-ball and establishment zone rather than allowing it to immediately run away across the landscape.
The berm should not bury the root flare.
Its purpose is simply controlling water distribution.
Think of it as a shallow basin that helps us put water where the newly establishing roots actually need it.
⸻
Watering Is Critical During Establishment
Once the tree is planted correctly, irrigation becomes one of the most important management variables.
The root system has not yet colonized the surrounding landscape.
That means the tree remains heavily dependent upon moisture inside and immediately surrounding the original root ball.
North Texas heat makes that particularly important.
The canopy can lose tremendous amounts of moisture through transpiration.
The limited root system has to replace that water.
⸻
But Don’t Overwater the Tree
This is equally important.
More water is not automatically better.
Roots need:
Water AND oxygen.
When soil remains continuously saturated, water fills the pore spaces that normally contain air.
Oxygen diffusion decreases.
Root respiration becomes impaired.
If saturation continues long enough, root-zone hypoxia can develop.
A newly planted tree can therefore decline from too little water or too much water.
The objective is balance.
⸻
Learn to Check the Root Ball
Don’t manage newly planted trees entirely from the irrigation controller.
Physically inspect the soil.
Check moisture inside the root ball.
Check moisture immediately outside the root ball.
Those two locations can behave completely differently.
A root ball may be dry while the surrounding soil is wet.
Or the root ball may remain saturated while the surrounding soil appears dry.
That’s why irrigation needs to be based on actual soil conditions, not simply minutes on a timer.
⸻
Field Capacity Is the Target Concept
After soil is thoroughly wetted and excess gravitational water drains away, the remaining moisture is approximately what we refer to as field capacity.
That’s generally where we want the establishment zone operating:
Enough plant-available water to supply the roots.
But enough air-filled pore space remaining for oxygen.
That’s the balance.
⸻
The First Three Months Deserve Special Attention
The earliest establishment period is where mistakes can become expensive.
During those first several months, the tree has very little margin for error.
A major drying event can kill absorbing roots.
Chronic saturation can also damage them.
That’s why newly planted trees should be inspected frequently during extreme North Texas weather.
As roots gradually colonize the surrounding native soil, the tree becomes less dependent upon the original root ball.
That’s when establishment is actually happening.
⸻
The First Year Builds the Foundation
I look at the first year as an investment.
Get the fundamentals right now:
Root flare.
Root architecture.
Planting depth.
Soil structure.
Native backfill.
Mulch.
Water.
Oxygen.
Structural development.
Do those things correctly and the tree becomes increasingly capable of supporting itself.
Do them incorrectly and we may spend years treating problems that originated on planting day.
⸻
Plant Healthcare Begins Before the Tree Gets Sick
This is one of the biggest messages I want homeowners to understand.
Plant Healthcare doesn’t begin when leaves turn brown.
It begins when we choose the tree.
It continues when we inspect the root ball.
It continues when we prepare the planting site.
It continues when we position the root flare.
And it continues through the establishment period while we monitor water, soil, roots, and canopy development.
Preventing problems is far easier than correcting them later.
⸻
Final Thoughts
These newly planted trees in Fort Worth, Texas give us an opportunity to do things correctly from the beginning.
Before planting, inspect the root ball.
Locate the true root flare.
Remove excess substrate when necessary.
Correct problematic circling and girdling roots.
Prepare a wide, shallow planting area.
Decompact and roughen the upper soil rather than creating a glazed planting hole.
Use native soil as the primary backfill.
Don’t unnecessarily loosen the soil underneath the root ball.
Protect temporary lower branches so the young tree can develop proper trunk taper.
Apply approximately two to three inches of coarse organic mulch while keeping it away from the trunk.
Create an appropriate irrigation berm where site conditions require it.
Then monitor water.
Not by guessing.
Not simply by looking at the irrigation timer.
Check the soil.
The tree needs water.
The tree needs oxygen.
And the tree needs an environment where its new absorbing roots can move from the nursery root ball into the surrounding landscape.
At Arborist USA, that’s what successful tree establishment means.
We aren’t simply putting a tree into the ground.
We’re building the root system that will support that tree for the next generation.
For general tree-care best practices, homeowners can also reference guidance from the Texas A&M Forest Service, https://tfsweb.tamu.edu/trees/, a trusted authority on Texas tree health.
Schedule a professional inspection. Early detection and scientific intervention are the difference between preservation and loss. If you’d like to speak to an arborist, please call us at 817-880-6130 or visit https://www.arboristusa.com
Today we’re in Fort Worth, Texas, walking through the proper steps for establishing newly planted trees.
Planting a tree is easy.
Establishing the root system correctly is where the real work begins.
In this video, I’m showing several important practices that can determine whether a newly planted tree thrives for decades or begins developing problems within its first few years.
Everything starts with the nursery root ball.
Once the tree comes out of the container, we need to inspect the root system for circling and girdling roots. Sometimes the true root flare is buried beneath the nursery substrate, requiring us to carefully remove the upper one to three inches until we locate the first major structural roots.
This is also the best time to correct problematic root architecture.